
Trip Costing
Overview
v.2.1.0’s release includes three ways a user can access the Cost Calculator to cost a transportation trip, as well as new additional features to enhance the capabilities when costing a trip.
The three ways to Cost a Trip are;
- A standalone service in which trips can be manually costed and managed
- Bulk importing of data via a CSV file
- Connect to the app via API
Additional features added to costing a trip are listed below; please view the respective categories for further information on each topic.
Costing a trip
Costing a trip with the Cost Calculator is quick and simple. In the image shown below, the various input fields and data generated by the application are explained in more detail.
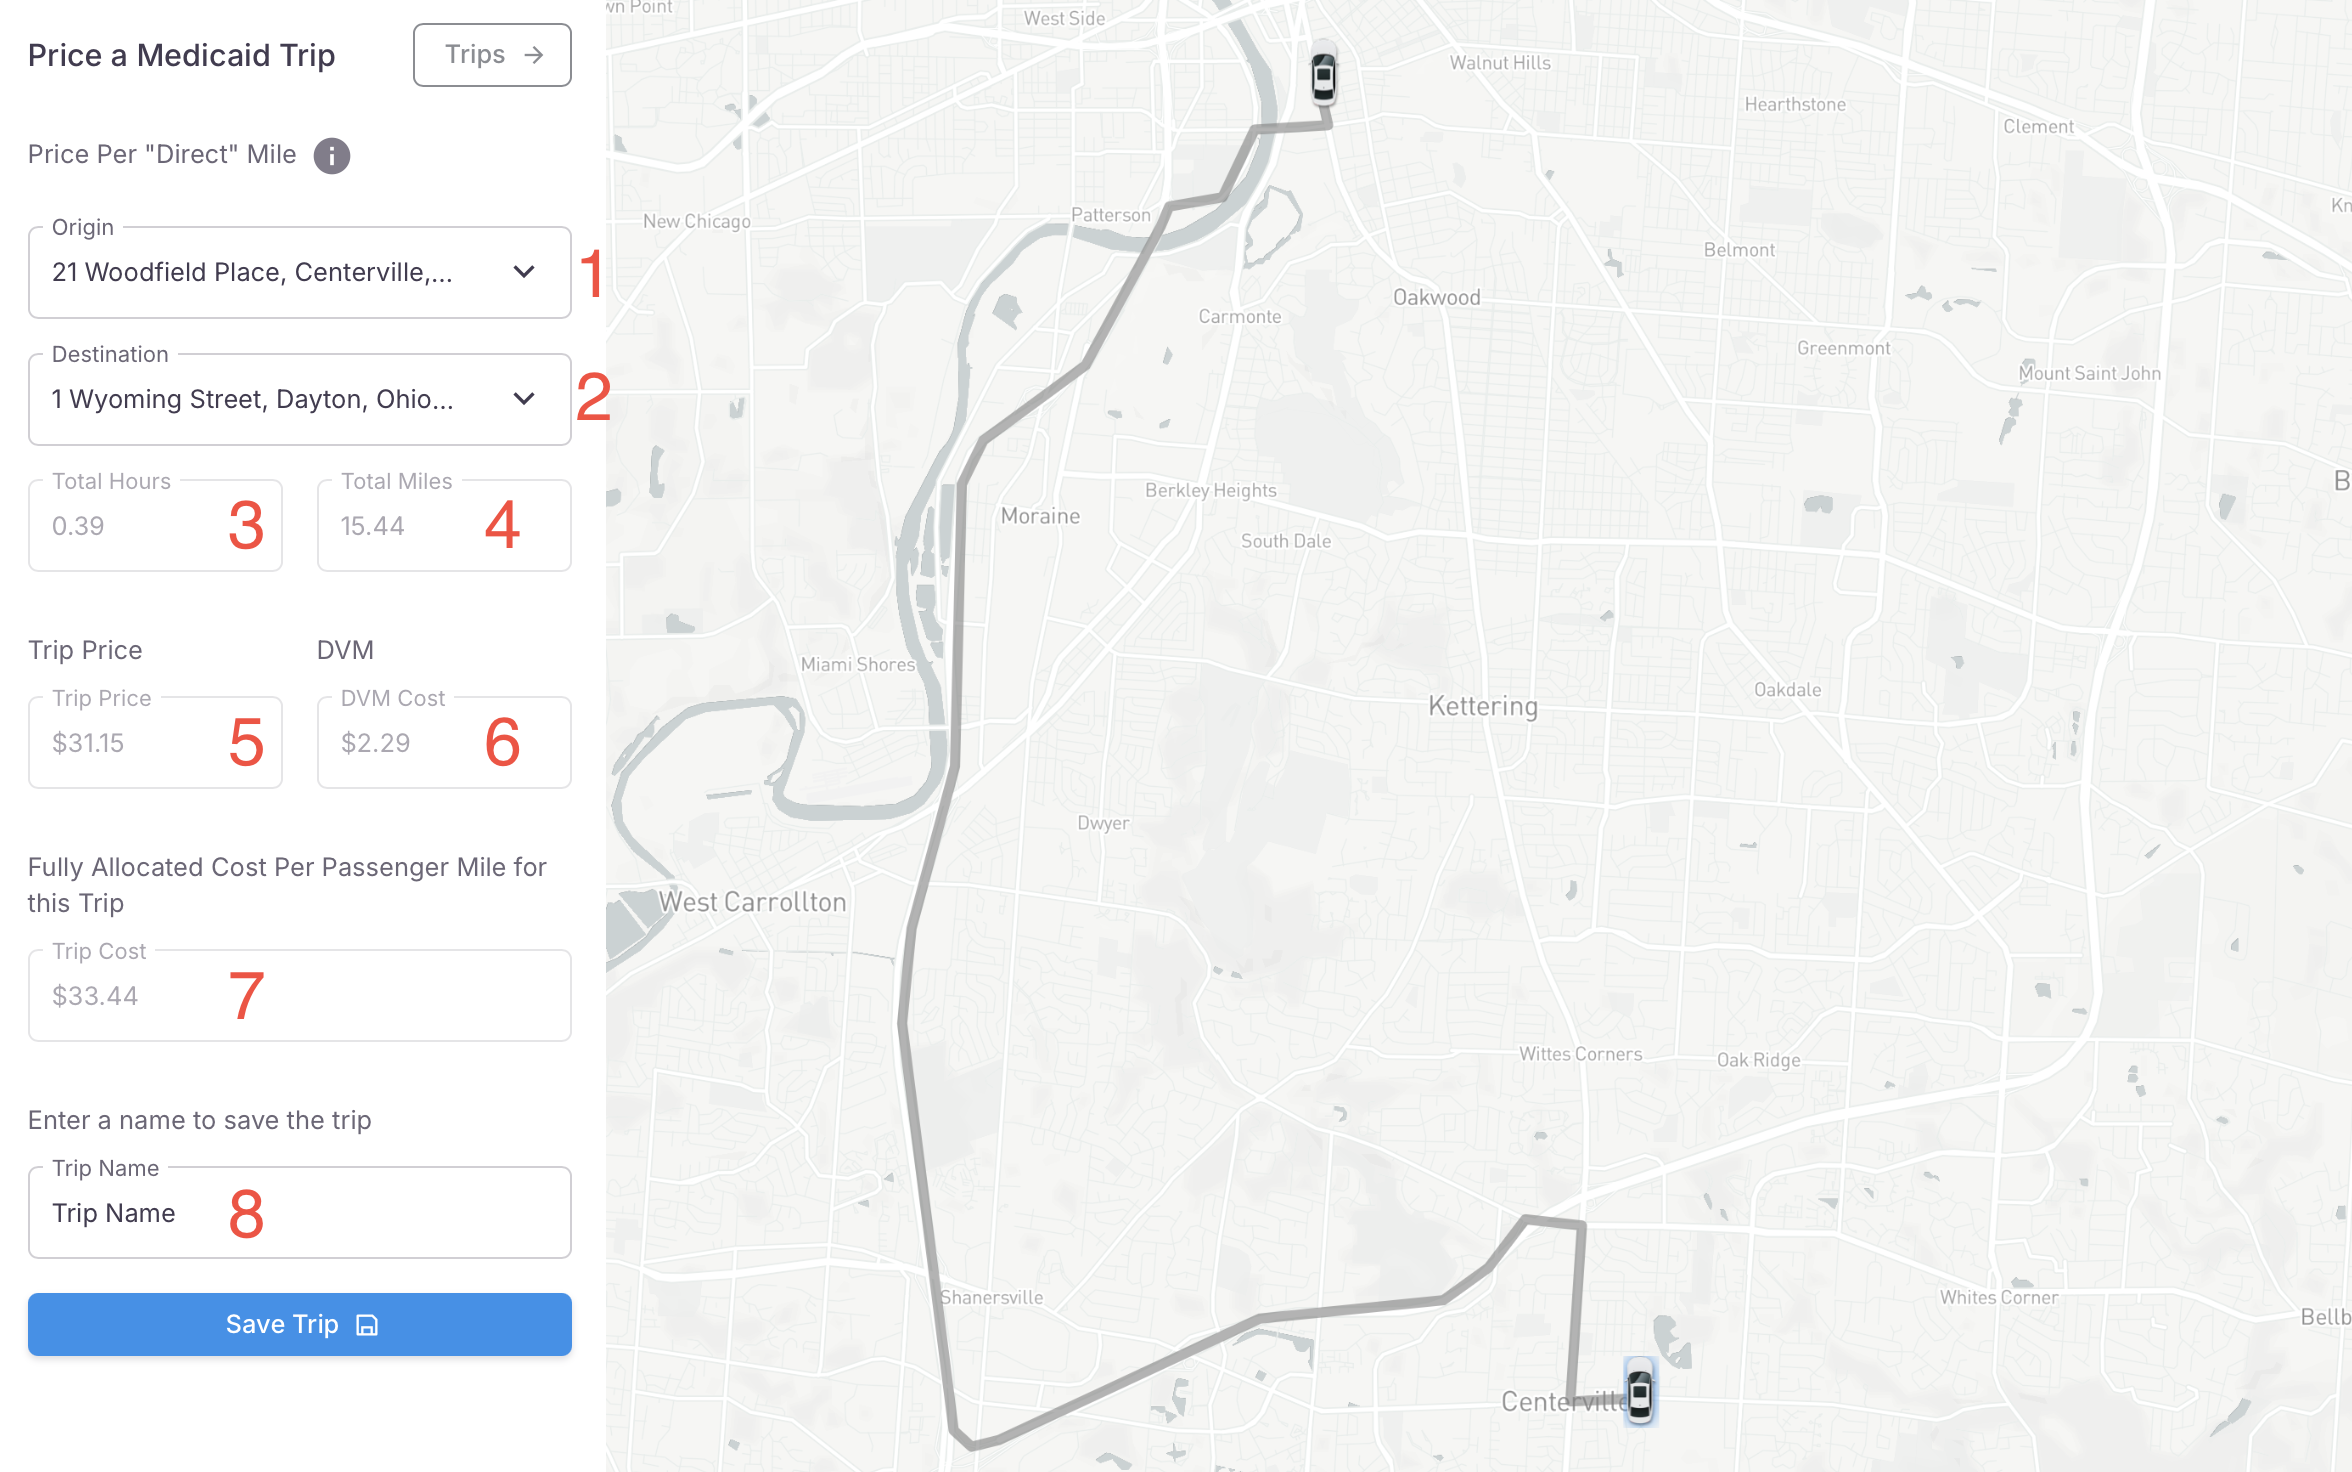
- Trip Passenger(s); One or more passengers are able to be added to a trip, click the dropdown field and select or search for your desired passenger.
- Trip Origin Address
- Trip Destination Address
- Custom name for the trip; (Optional)
- Agency the trip will belong to
- Date the trip occurred or will occur
- Trip Type;
- Single Trip; once saved will direct you to the Invoice in which you can further edit
- Recurring trip; once saved you will be brought to the events page where you can assign additional trips to this event.
Viewing previously run trips
There are multiple ways that one can view a previously run trip on the NEMT CC.
- From the trip pricing screen
- By accessing
- Trip > Results from the navigation menu
- Saved Prices from the navigation menu
Previously run trips - Pricing Screen
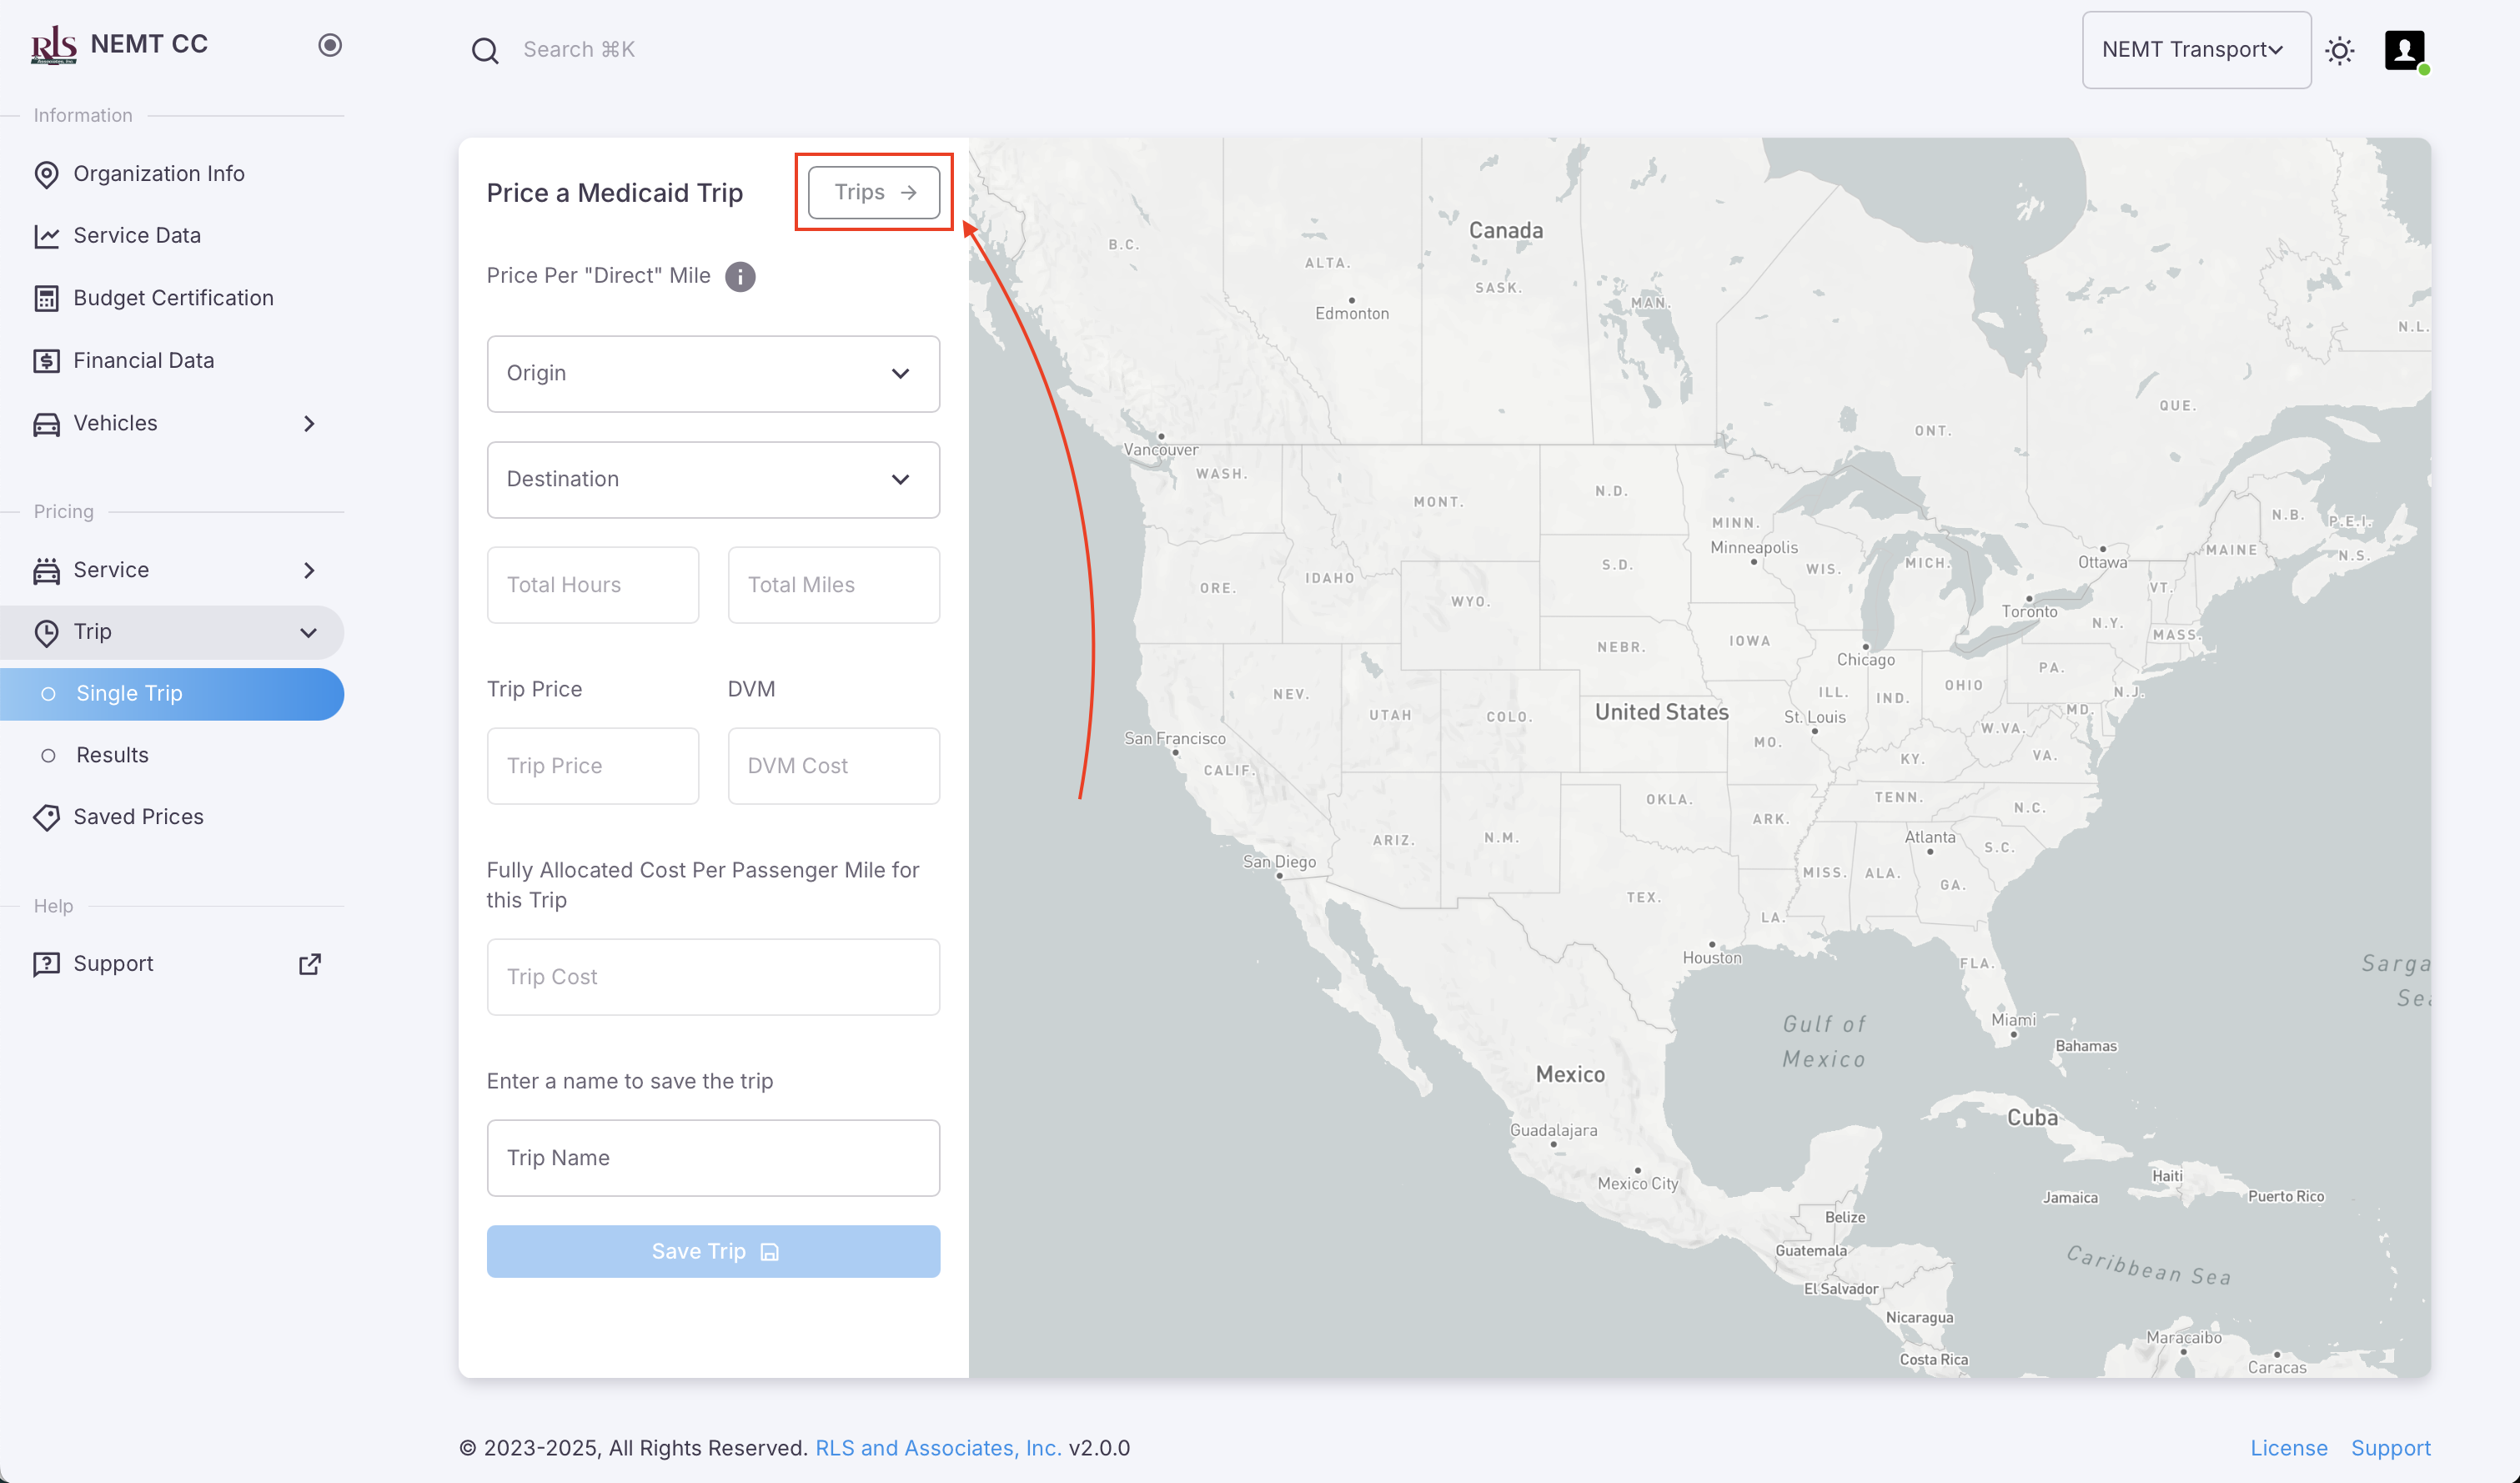
Previously run trips are easily accessible from the Trip Pricing page. To view these trips, please follow the steps outlined below.
- Click the 'Trips' button located in the top right of the input form

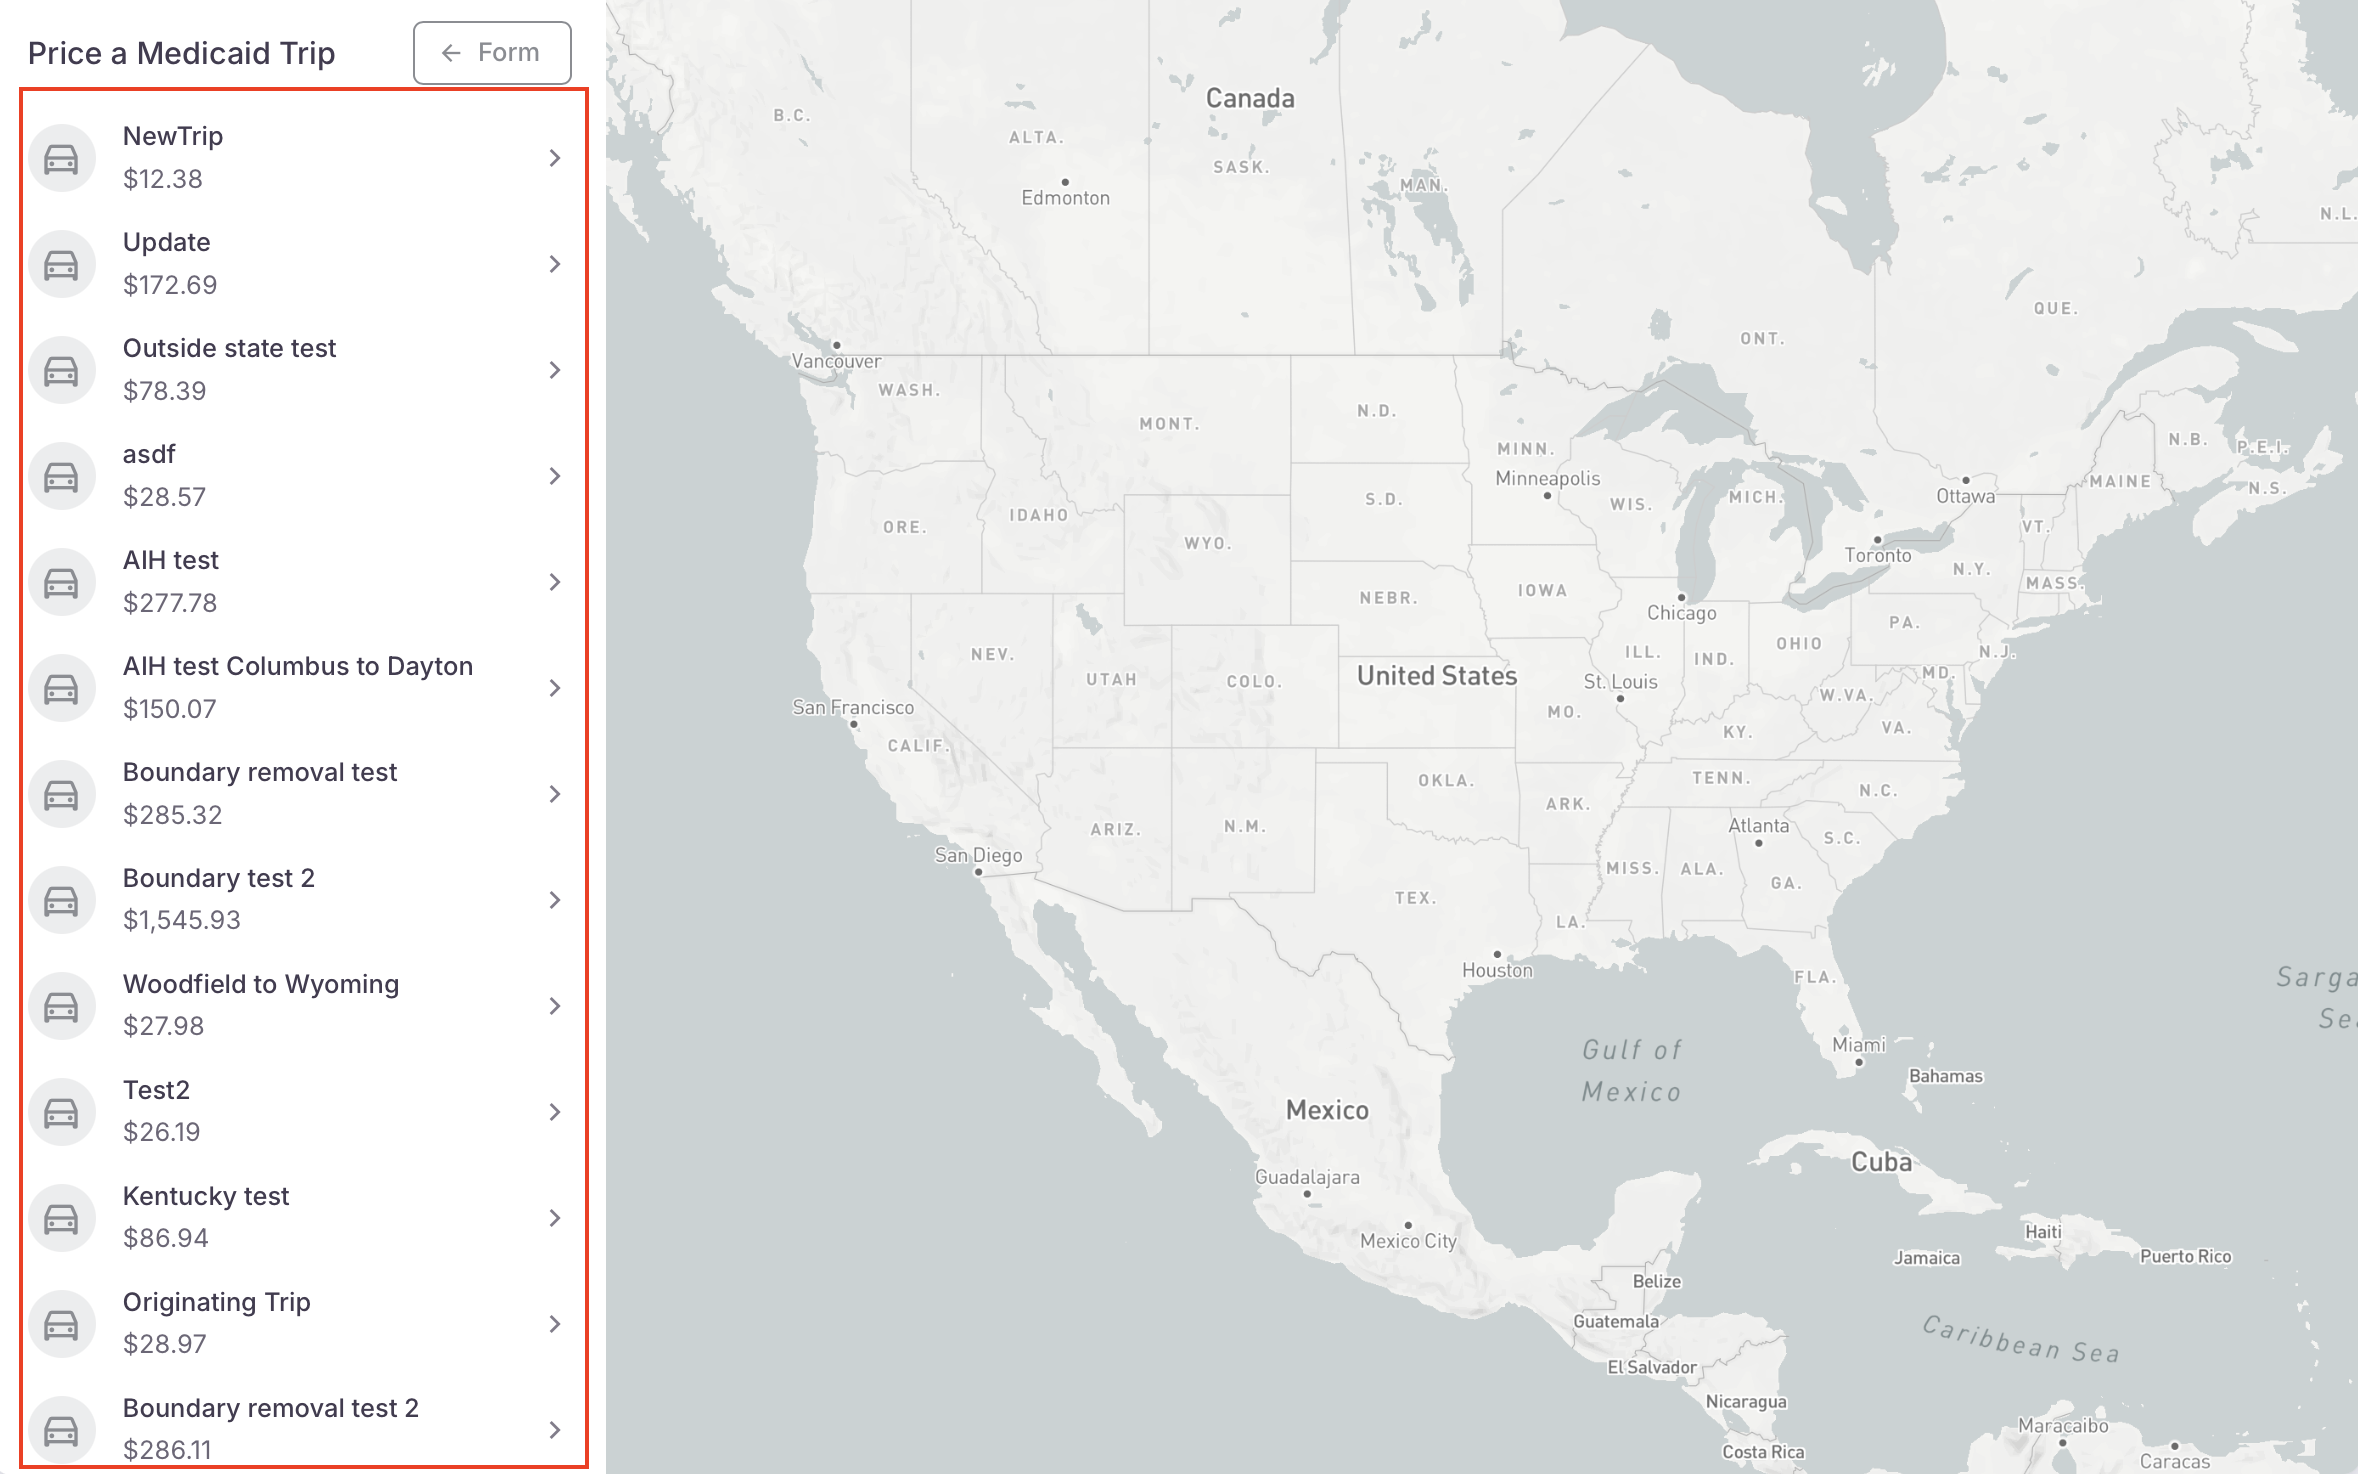
- This will bring up a list of the most previously run trips on the application

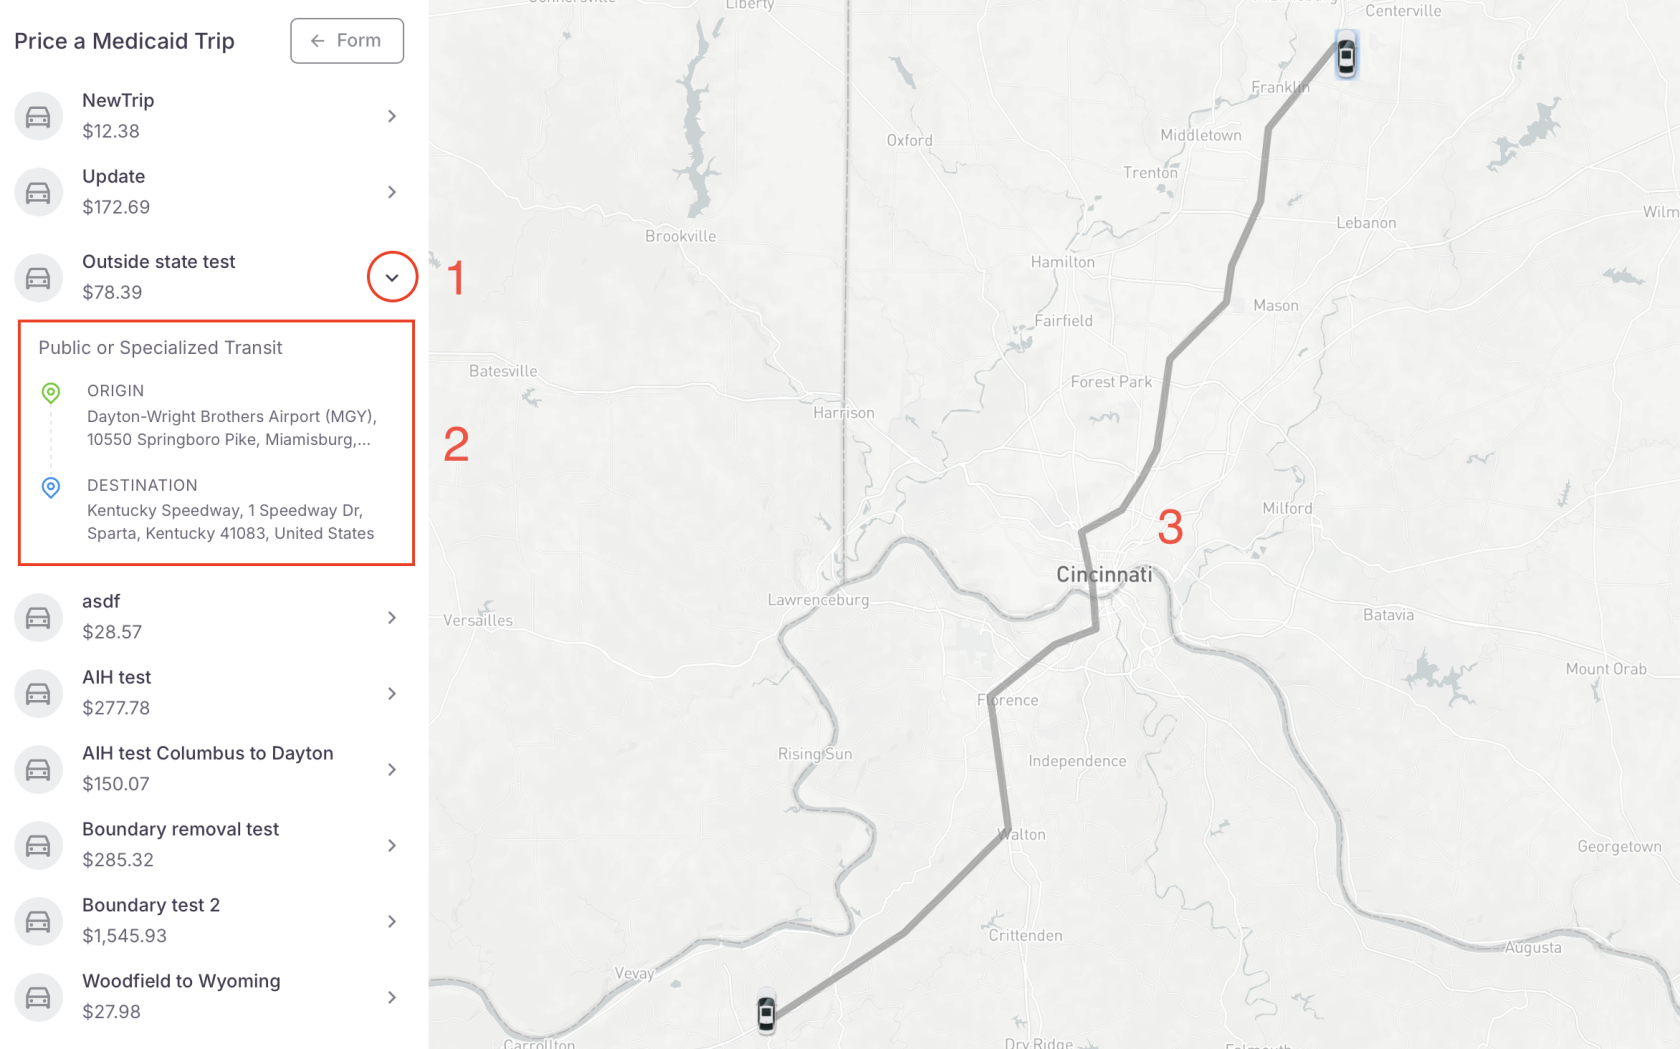
- Click the arrow next to the trip you want to view
- Click the arrow next to the trip you want to view
- The Trip details will show, Origin to Destination
- The map will highlight the suggested route

Previously run trips - Navigation Menu, Trip > Results
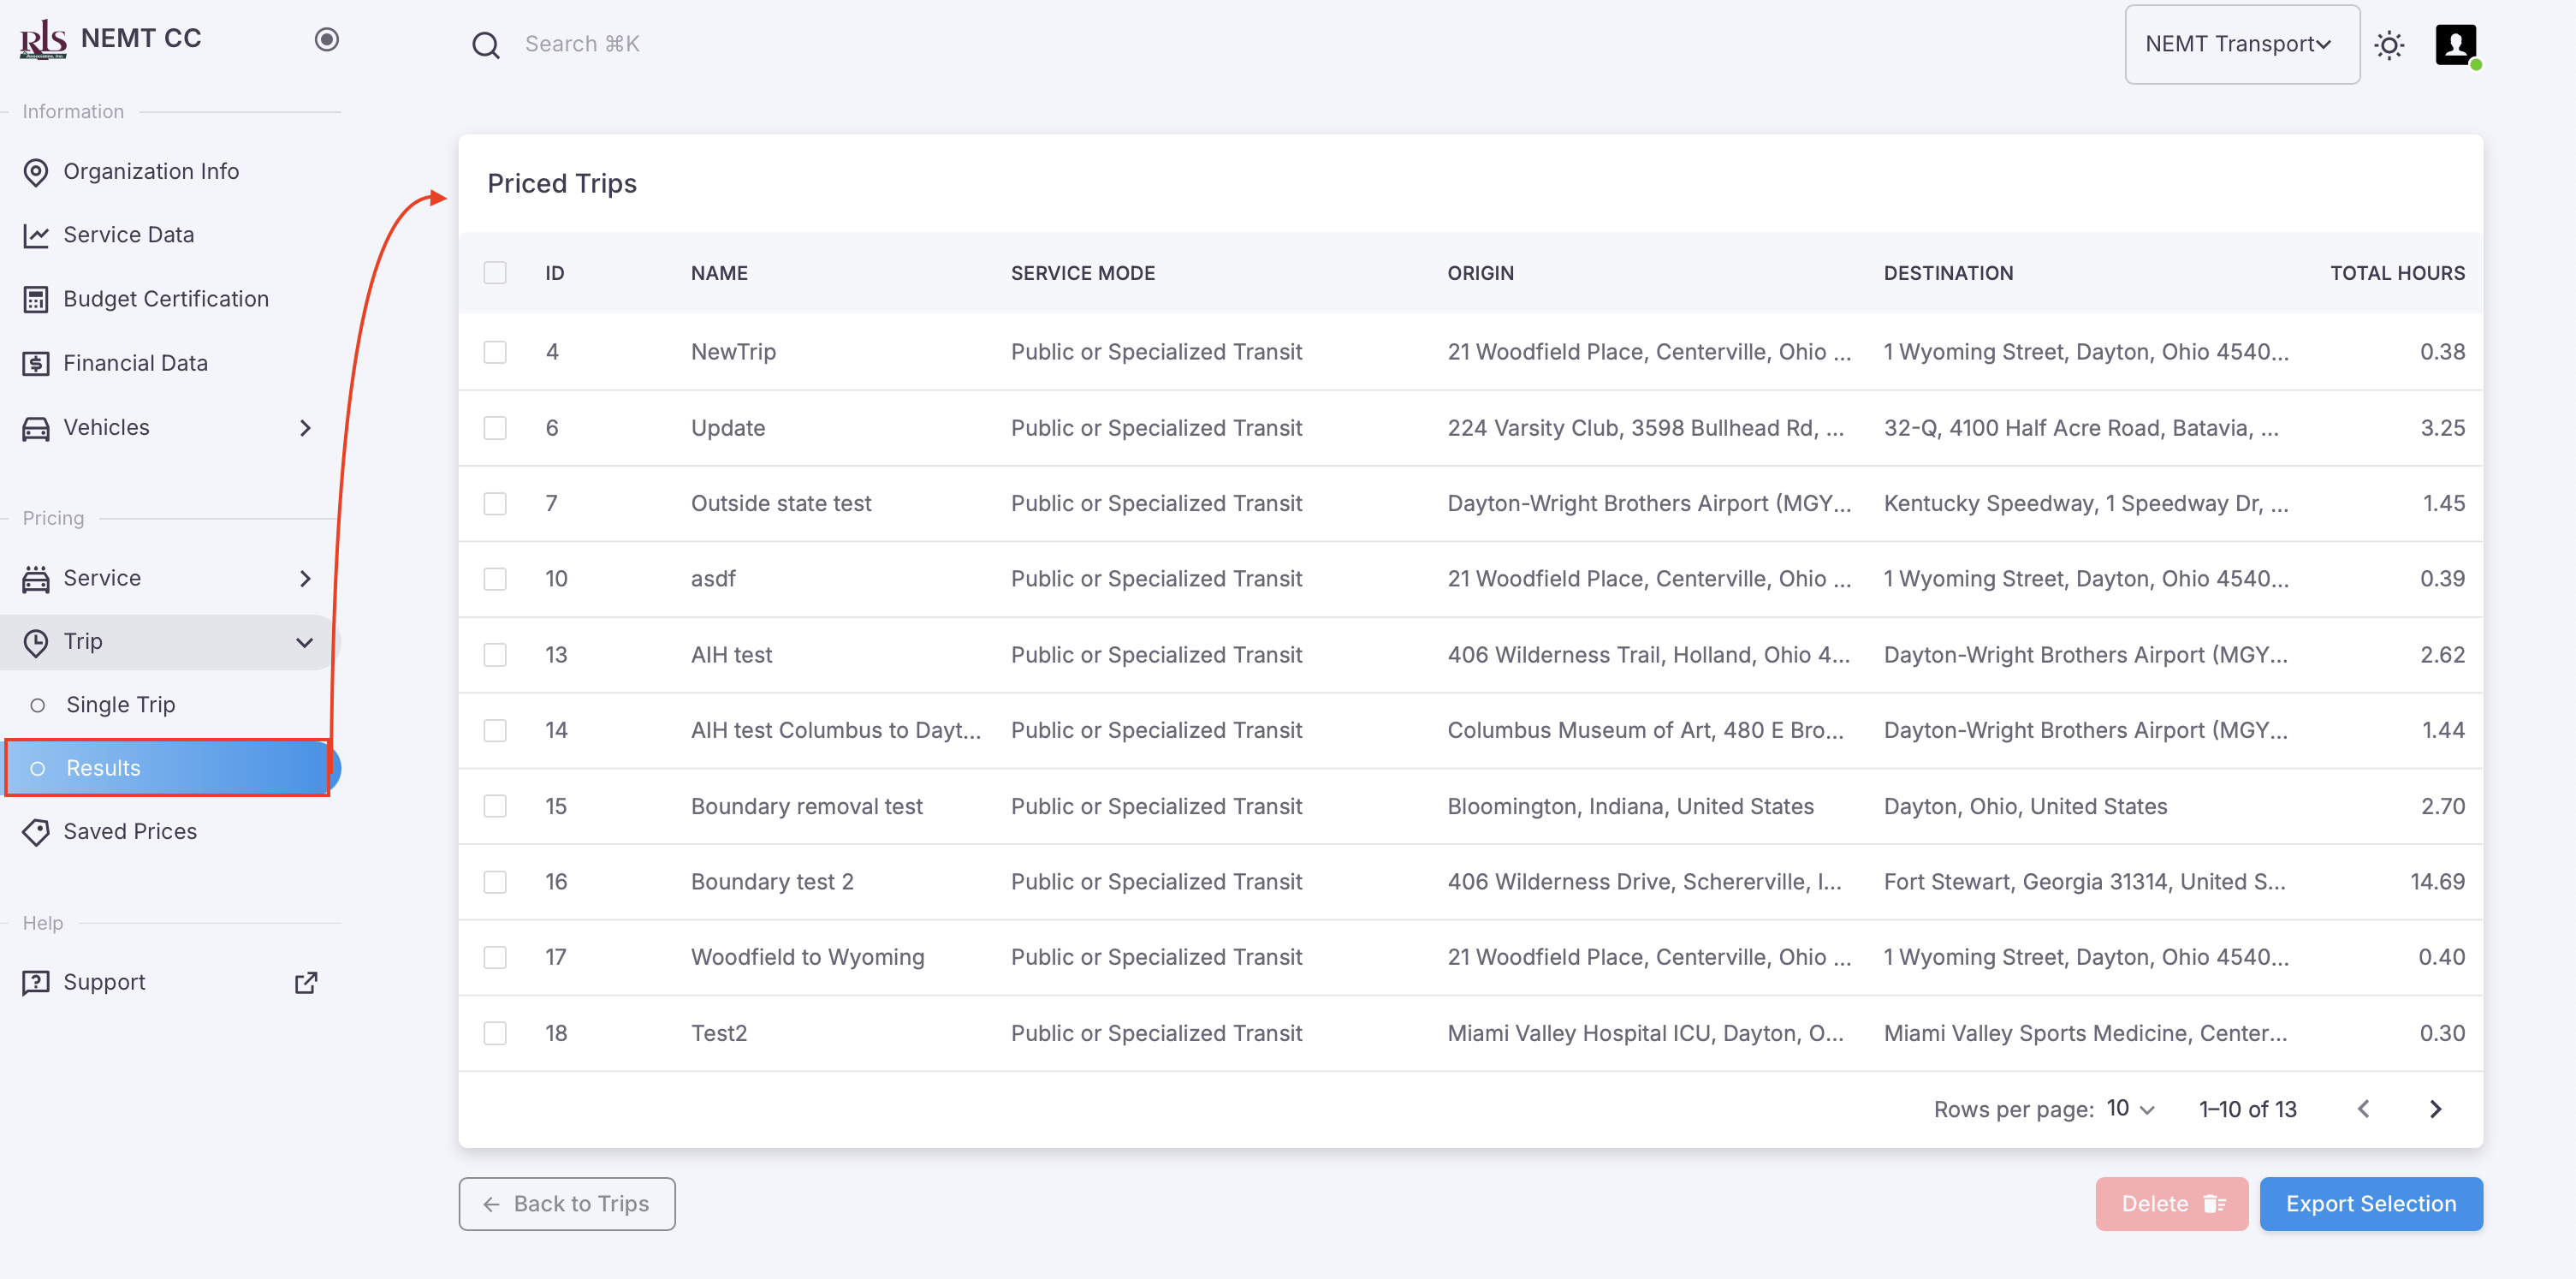
Exporting Data
All previously recorded trips and individually selected trips are able to be exported from the NEMT CC application. To export data, please follow these simple steps;
- Select the data you want to export; to select all, click the checkbox at the top of the table field as shown in image below #1.

- Once you have selected the records to export, click Export Selection located In the bottom right of the screen. Image above #2.

Previously run trips - Saved Prices
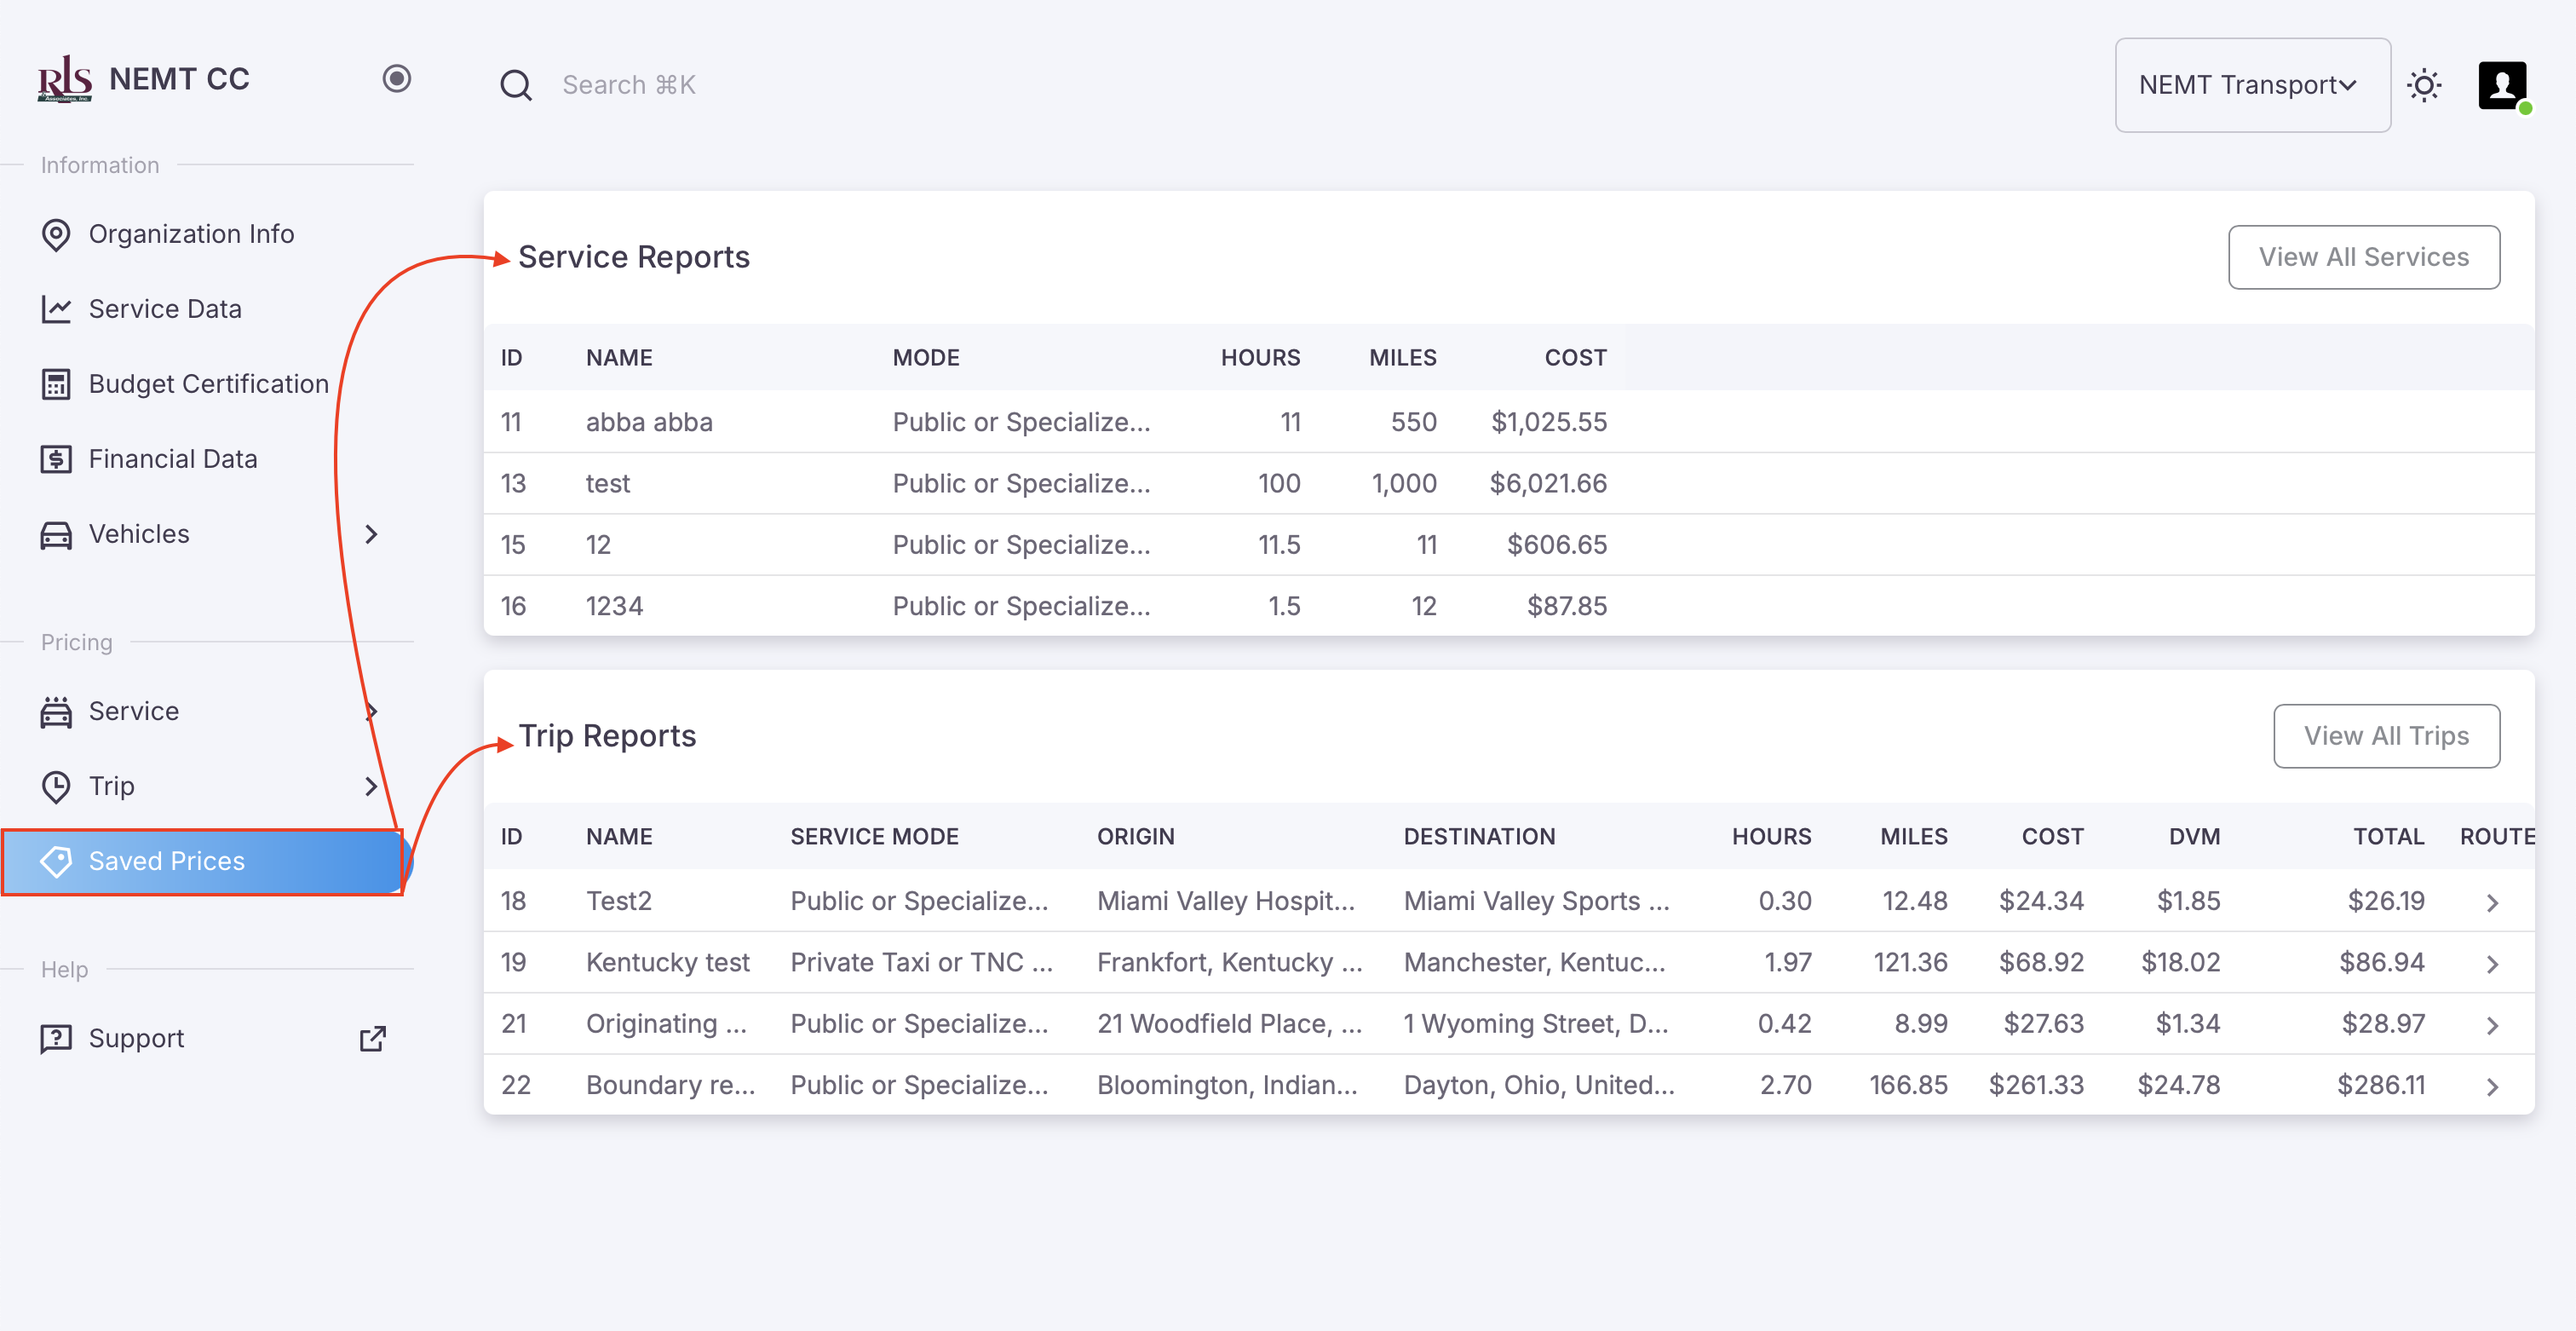
Quickly access the data from these records or click the button in the top right of each table to access the richer tables under each category labeled, Results in the navigation menu. Image shown below.
